Yesterday I saw lots of pics of gorgeous burlap wreaths on
Pinterest. However, most pictures were linked to wreaths for sale on Etsy and didn't give directions on how to make them. $70 for a burlap wreath? Um. No ma'am.
I thought, "How hard can it be?" So off to Michael's I go. I found some burlap garland at in the wreath-making supplies, but you could easily cut strips of burlap fabric. I'm all about saving some time, so I decided to use the garland. I also looked at the wreath forms and figured I'd just use a stretched out metal coat hanger and thread it through the burlap to form a "wreath".
Supplies Needed:
- 2-3 rolls of burlap garland (Michael's). I used 2, but I think 3 would be better.
- Metal coat hanger-stretched out and formed into a circle
- Decorations such as ribbon, ornaments, dried flowers, etc.
- Floral wire or hot glue to attach decorations
- Wreath hanger
Directions:
- Stretch out the metal coat hanger and form into a circle.
- Started folding burlap garland accordion-style about every 2-3 inches. This doesn't have to be exact.
- Once you've finished the folding the roll, secure with a rubber band. This makes it easier to work with and "trains" the burlap into the desired shape.
- If you notice in the picture below, I'm sitting with part of the hanger UNDER my leg to stabilize the it. This makes it a lot easier to manipulate the burlap onto the hanger. The hanger will have a "C" shape.
- Start threading the burlap onto the hanger.
- You don't have to be precise (i.e. thread it in the same spot for each fold or make it 2-3 inches each time).
- Another tip: Leave about 6 inches free at the end of the hanger (see below) . Use that length like a needle to push through the middle of each fold. Once it's "full", push the fabric down to allow for more threading.
- Keep threading until you finish the first burlap roll, then continue with the second and/or third roll.
- Here's the fun part....twisting the ends of the hanger together to form a circle. This might be where you bat your eyelashes and ask your husband or boyfriend for help:-) Be careful when twisting. The ends of the hanger can be sharp.
- Once the ends are twisted, fluff the burlap and continue to shape the hanger into a circle until you are satisfied with the shape and fullness.
- TA-DA! Pretty cool, huh? I love how organic and versatile burlap is. However, I SHO' NUF DON'T like how stinky it is. And that, my friends, is why it will go outside.

Here are some ideas on how you can decorate the wreath.
*I already had all the decorations in my holiday decorating stashes and floral arranging supplies.
 |
Fall leaves tucked in the wreath
|

Crow with gauzy fabric
 |
| Styrofoam skull, gauzy material, and part of last year's broken Halloween sign |
 |
| Close-up |
 |
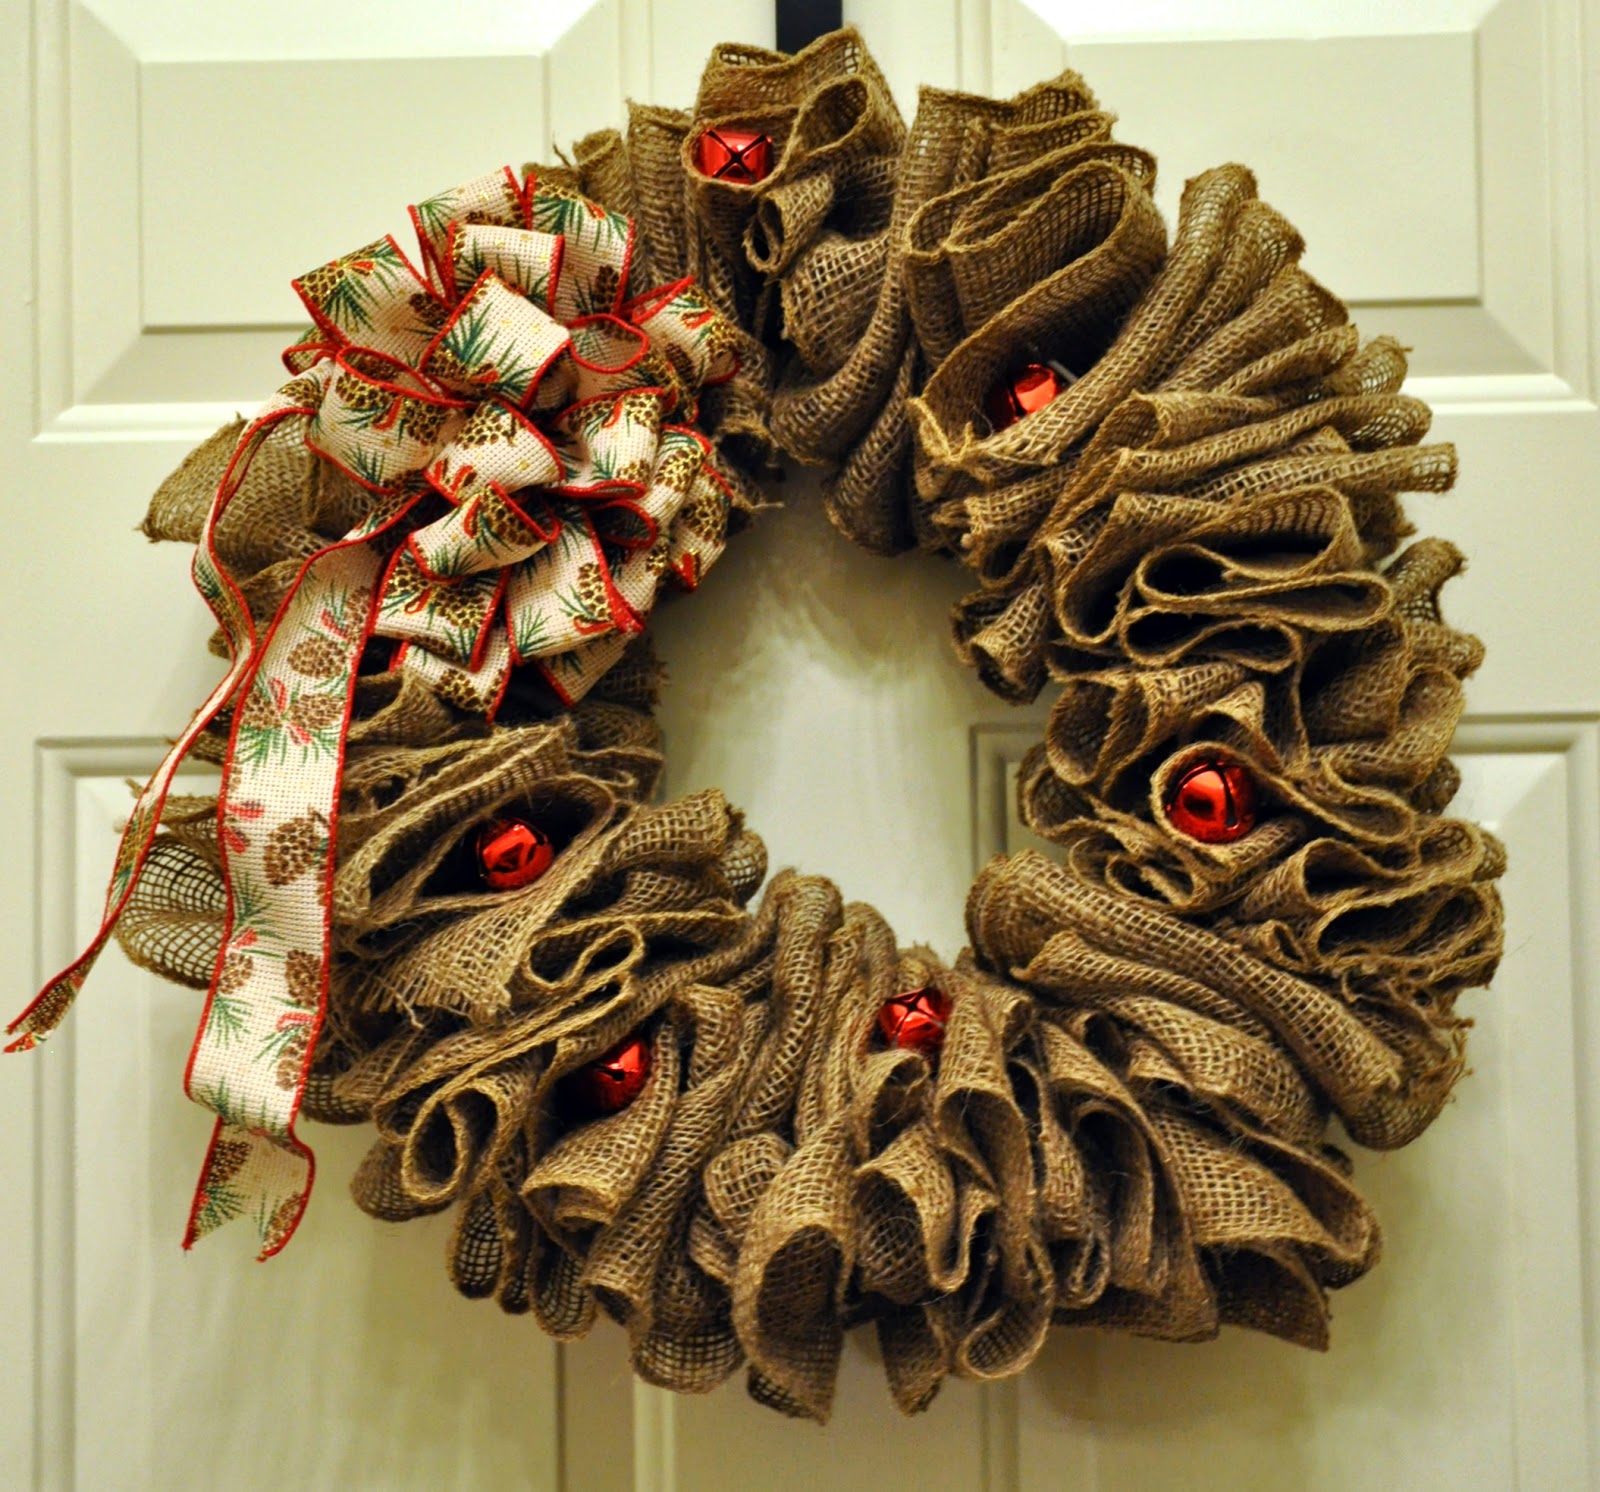
| Christmas Ribbon with Red Bells |
 |
Top Left-concrete mushrooms, Top Right-Gauzy Fabric and Faux Coral
Bottom Left- Plain w/red ribbon, Bottom Right-Feather & succulents |
Let me know if you make one! I'd love to see pics!


This is so fun and reminds me of something hanging in Anthropologie. You can definitely use this all year round, too and just change out the decorations. Love, love, love it!
ReplyDeleteI love this! And it looks like something I can do without using paint or tools, which are a no-no in condo living! Thanks!
ReplyDeletethank you so much for this tutorial! i've seen these on pinterest and was wondering how to make one.
ReplyDeletethese are adorable!!! love!
ReplyDeleteThat looks fabulous! You did a great job!
ReplyDeleteLove it! I was hoping to make a burlap wreath for the fall/winter and this is the easiest one I've seen. Thanks for sharing!
ReplyDeleteI love love love it! Not only for fall but we are hosting my dad and his twin sister's 50th birthday at my house in March and it's a country/bbq theme- the burlap would go perfectly with it!
ReplyDeleteYou are so clever! This looks awesome and if I was home for the weekend in October just once, I would be off to Michael's to tackle this!
ReplyDeleteThanks ladies! If you decide to make one and have questions, feel free to ask. I'll be glad to help.
ReplyDeleteI did a burlap wreath the other day. I did a post about it on my blog and my sweet friend (Beach Bum & Baby) told me you had one on your blog too! I had to check it out! I just love burlap and turning anything burlap into a work of art is a MAJOR win!
ReplyDeleteI LOVE how your wreath turned out and all the ideas you came up with. Yod did a GREAT job!
Here is a link to my wreath:http://sahmingitontheplains.blogspot.com/2011/10/diy-burlap-wreath.html
~KM
KM~
ReplyDeleteThanks for stopping by! I'm a burlap addict too. LOL. I just wish it had a better smell....like roses or french fries. hehe I'll have to check yours out!
Love, love, love this quick burlap wreath tutorial. I have two rolls of it and need to get one of these put together. I'm a happy new follower:-)
ReplyDeletei love all these fun wreaths, but no one ever says how much burlap they are using, or how big of a wire form they're using! So my question is, how much burlap did you use and how wide is it? I have burlap by the foot, I havent seen the burlap garland in my area yet. I love this wreath!!!
ReplyDeleteThank you for making this such an easy tutorial, love it! Can't wait to get making on these, the wheels are already starting to turn on what I can do, hmmmm, no dinner tonight lol
ReplyDeleteLove it! I was hoping to make a Burlap Ribbon wreath for the fall/winter and this is the easiest one I've seen. Thanks for sharing!
ReplyDelete